
Spring-Security 환경설정 및 로그인화면 구현 1
13 Apr 2018 | NetworkSpring-Security
- 스프링 시큐리티(Spring Security)는 스프링 서브 프로젝트 중 하나로 스프링 기반의 어플리케이션을 보호하기 위한 필수적인 프레임워크이다.
- 스프링 시큐리티는 보안을 체계적으로 관리하며, 개발한 스프링 어플리케이션들과 유연하게 연결된다. 그리고 오랜기간 다양한 피드백으로 개발되어 신뢰도가 높다.
- 간단안 선언문만으로도 작동하므로 대량의 코드를 손쉽게 절약해준다.
- 주의점!!, depengency에 환경설정시 스프링 프로젝트의 버전과 시큐리티 라이브러리 버전을 주의한다. 나의 경우 라이브러리 추가시 버전이 달라 충돌이 나기도 했다..(이게 맞는말인가?)
- 인프런 자바스프링프레임워크 25-27강
환경설정
[1] project의 pom.xml에 스프링에서 지원하는 security 라이브러리를 추가한다.
<!-- Spring Security -->
<dependency>
    <groupId>org.springframework.security</groupId>
    <artifactId>spring-security-web</artifactId>
    <version>3.2.3.RELEASE</version>
</dependency>
<dependency>
    <groupId>org.springframework.security</groupId>
    <artifactId>spring-security-config</artifactId>
    <version>3.2.3.RELEASE</version>
</dependency>
<dependency>
	<groupId>org.springframework</groupId>
	<artifactId>spring-web</artifactId>
	<version>3.2.0.RELEASE</version>
</dependency>
[2] 보안관련 설정파일을 만들어 web.xml에 추가한다.
- web.xml에 아래 경로를 추가한다.
- 해당경로에 설정파일을 만든다.
/WEB-INF/spring/appServlet/security-context.xml
<context-param>
<param-name>contextConfigLocation</param-name>
    <param-value>
    /WEB-INF/spring/root-context.xml
    /WEB-INF/spring/appServlet/security-context.xml
    </param-value>
</context-param>
[3] 이어서 web.xml에 filter를 적용한다.
- 여기서 주의할 점은
의 값이 반드시 springSecurityFilterChain이어야 한다!.
<filter>
    <filter-name>springSecurityFilterChain</filter-name>
    <filter-class>org.springframework.web.filter.DelegatingFilterProxy</filter-class>
</filter>
<filter-mapping>
    <filter-name>springSecurityFilterChain</filter-name>
    <url-pattern>/*</url-pattern>
</filter-mapping>
[4] 여기서 죽게 고생 ㅠㅠ- appServlet안에 security-context.xml파일을 만든다.
bean에 xmlns:security="http://www.springframework.org/schema/security"를 추가한다.
뭣때문인지 모르겠는데 여기서부터 인강처럼 되지않고 시큐리티 태그에 에러가 계속 떳다….
그래서 나는 아래과 같이 수정. 그랬더니 잘된다.
- security-context.xml의 네임스페이스는 아래와 같이 설정하였다.(인강이랑 다른점)
- 이 네임스페이스는 security를 기본 xmlns로 선택하고 있는 컨텍스트 네임스페이스이다.
<beans:beans>로 된 점을 주의<http auto-config="true">: 스프링 시큐리티는 기본적으로 Ahthorization(권한 부여)에 관한 대부분의 설정이요소에 위치해 있으며 설정 가능한 모든 요소에 디폴트 값이 존재한다. 그러므로 요소의 auto-config 속성을 true로 잡아줌으로써 우리는 모든 디폴트 속성값으로 서버를 설정한 것. <intercept-url>: DelegatingFilterProxy에서 가로챈 요청을 좀 더 세부적으로 나눠주며(pattern) 접근할 수 있는 권한을 설정(access)합니다.- ROLE_USER와 같이 부여된 권한(Granted Authority) 설정은 어디서 하게 되는 걸까? : 리소스의 권한(Intercept)은 Authentication(인증)의 영역에 포함됩니다. 우리가 무언가의 인증을 받은 후에 리소스에 접근할 권한을 얻게 되므로 리소스의 권한은 인증작업에 일부가 되는 셈이죠. 그렇다면 부여된 권한(Granted Authority)는 어디에 속할까요? 바로 Authorization(권한부여)에 속하게 됩니다. 권한을 부여하려면 먼저 권한부터 설정되있어야 하며 궁극적으로 설정된 권한을 유저에게 부여해줘야 하기 때문입니다.
그러므로
<http>요소는 Authentication(인증)의 범주에 속해있으며 스프링 시큐리티는 Authorization(권한부여)의 영역을 분할하기 위해<authorization-manager>란 요소를 따로 사용하고 있습니다. 출처:부여된 권한
<?xml version="1.0" encoding="UTF-8"?>
<beans:beans xmlns="http://www.springframework.org/schema/security"
  xmlns:beans="http://www.springframework.org/schema/beans"
  xmlns:xsi="http://www.w3.org/2001/XMLSchema-instance"
  xsi:schemaLocation="http://www.springframework.org/schema/beans
           http://www.springframework.org/schema/beans/spring-beans-3.2.xsd
           http://www.springframework.org/schema/security
http://www.springframework.org/schema/security/spring-security-3.2.xsd"><intercept-url>은 DelegatingFilterProxy에서 가로챈 요청을 좀 더 세부적으로 나눠주며(pattern) 접근할 수 있는 권한을 설정(access)한다.- 먼저 인증받을 사용자의 아이디와 비밀번호를 입력한 뒤에 해당 사용자에게 권한(ROLE_USER)를 부여한다. 가급적 ‘ROLE_‘ 이란 문자열로 시작해야 한다. 왜냐하면 스프링 시큐리티는 RoleVoter라고 부여된 권한(Granted Authority)을 검사하는 클래스를 가지고 있는데 이 검사자가 문자열이 ROLE_이란 접두어로 시작하는 지를 검사하기 때문. 만약 ROLE_이란 접두어로 시작하지 않는다면 시큐리티는 접근 보류(ACCESS_ABSTAIN)라는 결론을 짓게 된다.
<http auto-config='true' >
        <intercept-url pattern="/login.html*" access="ROLE_USER"/>
        <intercept-url pattern="/welcome.html*" access="ROLE_ADMIN"/>
</http>

<authentication-manager>
    <authentication-provider>
        <user-service>
            <user name="user" password="123" authorities="ROLE_USER"/>
            <user name="admin" password="123" authorities="ROLE_ADMIN,ROLE_USER"/>
        </user-service>
    </authentication-provider>
</authentication-manager>
</beans:beans>
보안관련 taglib를 추가한 뒤 로그인화면에 적용하기.
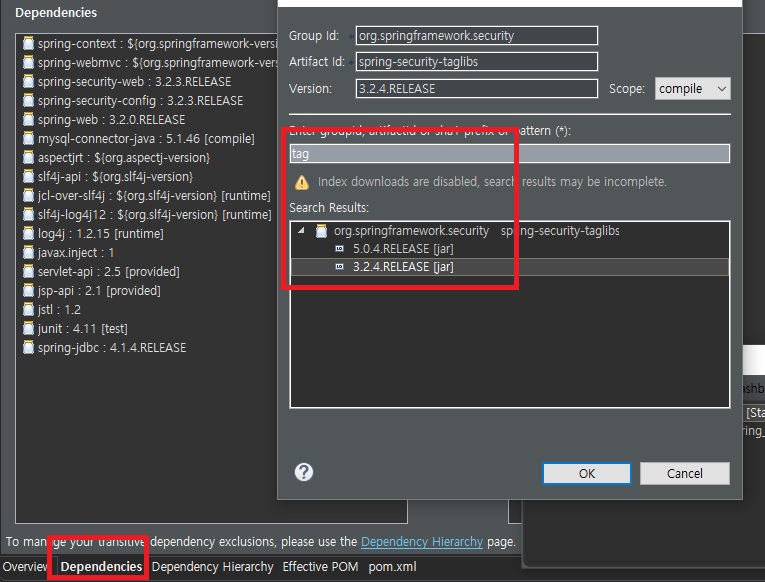
[1] pom.xml에 아래와 같이 taglib를 추가할 수 있다. (프로젝트 스프링프레임워크 버전이 3.2이므로 똑같이 3.2로 맞춰서 add시킴.)
[2] 그리고 login.jsp 파일에 taglib 를 추가하고 아래의 소스코드를 넣어 로그인이 되도록한다.
- 추가하는 taglib
<%@ taglib uri="http://www.springframework.org/security/tags" prefix="s" %>
[3] s 엘리먼트요소에 ifAnyGranted라는 권한을 ROLE_USER 로 줘서, security-context.xml에 설정했던 user 정보가 맞는지 체크한다(?) 틀리면 로그인 실패 페이지를, 맞으면 로그인화면을 반환한다.
<s:authorize ifAnyGranted="ROLE_USER">
<p> is Log-In</p>
</s:authorize>

<s:authorize ifNotGranted="ROLE_USER">
<p> is Log-Out</p>
</s:authorize>

<%-- USER ID : ${pageContext.request.userPrincipal.name}<br/> --%>
USER ID : <s:authentication property="name"/><br/>
<a href="${pageContext.request.contextPath}/j_spring_security_logout">Log Out</a> <br />
Comments